mobiledecoder2:firmupdate:arduino
差分
このページの2つのバージョン間の差分を表示します。
| 両方とも前のリビジョン前のリビジョン次のリビジョン | 前のリビジョン | ||
| mobiledecoder2:firmupdate:arduino [2021/07/02 16:28] – ytsurui | mobiledecoder2:firmupdate:arduino [2022/12/09 13:09] (現在) – [はじめに] ytsurui | ||
|---|---|---|---|
| 行 1: | 行 1: | ||
| ====== ファームウェア更新方法 (Arduino版) ====== | ====== ファームウェア更新方法 (Arduino版) ====== | ||
| - | このページでは、サークル「MT40」で頒布している、「[[: | + | このページでは、サークル「MT40」で頒布している、「[[: |
| これ以外の機種の場合は、該当の機種のページをご参照ください。 | これ以外の機種の場合は、該当の機種のページをご参照ください。 | ||
| 行 17: | 行 17: | ||
| ^ デコーダの型番 ^ 対応するスケッチ ^ | ^ デコーダの型番 ^ 対応するスケッチ ^ | ||
| - | | K3066RA | [[https:// | + | | K3066RA | [[https:// |
| | K3057RA | ::: | | | K3057RA | ::: | | ||
| | K3057RA-S | ::: | | | K3057RA-S | ::: | | ||
| - | | K3057-T | [[https:// | + | | K7012RA | ::: | |
| + | | T-EC215RA | ::: | | ||
| + | | M02F0RA | ::: | | ||
| + | | M02F7RA | ::: | | ||
| + | | K3057-T | [[https:// | ||
| | K3057-ST | ::: | | | K3057-ST | ::: | | ||
| + | | T-EC215Tc | ::: | | ||
| + | | T-EC215F | ::: | | ||
| ---- | ---- | ||
| 行 115: | 行 121: | ||
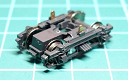
| 線路電源の端子については、ワニ口クリップで線路電源 (コマンドステーション出力やDC12V) 、またはArduino上から供給する+5V電源に接続します。 | 線路電源の端子については、ワニ口クリップで線路電源 (コマンドステーション出力やDC12V) 、またはArduino上から供給する+5V電源に接続します。 | ||
| + | |||
| + | <WRAP group> | ||
| + | <WRAP half column> | ||
| + | {{ : | ||
| + | </ | ||
| + | |||
| + | <WRAP half column> | ||
| + | {{ : | ||
| + | </ | ||
| + | </ | ||
| + | |||
| もっとも単純な接続事例を下記写真で示しますので、参考にしてください。 | もっとも単純な接続事例を下記写真で示しますので、参考にしてください。 | ||
| 行 128: | 行 145: | ||
| K3057シリーズは構造上、線路端子の裏側に別のパターンが存在しており、そのままワニ口クリップで基板を挟むとはんだレジストが損傷し、意図せず短絡してデコーダ焼損が発生するケースがあります。 \\ | K3057シリーズは構造上、線路端子の裏側に別のパターンが存在しており、そのままワニ口クリップで基板を挟むとはんだレジストが損傷し、意図せず短絡してデコーダ焼損が発生するケースがあります。 \\ | ||
| - | そのため、下記例のように厚紙やプラ板などを挟み、線路端子の反対側を保護するように接続してください。 | + | そのため、下記例のように適当な厚紙やプラ板などを挟み、線路端子の反対側を保護するように接続してください。 |
| {{: | {{: | ||
| {{: | {{: | ||
| + | |||
| + | ---- | ||
| + | |||
| + | ====== Arduino IDEへボード情報を追加する ====== | ||
| + | |||
| + | 先ほど用意したスケッチをビルド・書き込みできるようにするため、Arduino IDEにボード情報を追加します。 | ||
| + | |||
| + | [[https:// | ||
| + | |||
| + | ===== megaTinyCoreの追加方法 ===== | ||
| + | |||
| + | ==== ボードマネージャのURL追加 ==== | ||
| + | |||
| + | ファイル -> 環境設定と開き、「追加のボードマネージャのURL」に、「http:// | ||
| + | |||
| + | {{: | ||
| + | {{: | ||
| + | |||
| + | ==== ボード情報のインストール ==== | ||
| + | |||
| + | ツール -> ボード -> ボードマネージャを開き、「megaTinyCore」をインストールします。 | ||
| + | |||
| + | {{: | ||
| + | {{: | ||
| + | |||
| + | ボード情報のダウンロードに少し時間がかかりますが、これでmegaTinyCoreの追加は完了です。 | ||
| + | |||
| + | ==== MacOSをお使いの場合 ==== | ||
| + | |||
| + | 一部のメニュー表示が異なります。 \\ | ||
| + | Arduino -> Preferencesを開くと、環境設定が開きます。 | ||
| + | |||
| + | {{: | ||
| + | |||
| + | また、2021/ | ||
| + | |||
| + | {{: | ||
| ---- | ---- | ||
| 行 139: | 行 193: | ||
| [[https:// | [[https:// | ||
| - | 現在の最新バージョン: Version 2021.07.02 (v1.0.2) | + | 現在の最新バージョン: Version 2021.07.02v2 (v1.0.2) |
| {{: | {{: | ||
| 行 149: | 行 203: | ||
| | K3057-T | [[https:// | | K3057-T | [[https:// | ||
| | K3057-ST | ::: | | | K3057-ST | ::: | | ||
| + | |||
| + | zipファイルを展開すると、中にinoファイルが入っていますのでこれをArduino IDEで開きます。 | ||
| + | |||
| + | {{: | ||
| ---- | ---- | ||
| - | ====== | + | ====== ボードの設定 |
| - | 先ほど用意したスケッチをビルド・書き込みできるようにするため、Arduino IDEにボード情報を追加します。 | + | Arduino IDE側の書き込み設定を、デコーダに搭載されているマイコンに合わせます。 |
| - | [[https:// | + | 設定が下の表および画像と同じになるように変更します。 |
| - | ===== megaTinyCoreの追加方法 ===== | + | ^ 設定名 ^ 設定内容 ^ |
| + | | ボード | ATtiny3226/ | ||
| + | | Chip or Board | ATtiny1606 (motordecoder2の場合) \\ ATtiny806 (funcdecoder2の場合) | | ||
| + | | Clock | 20MHz internal | | ||
| + | | millis()/ | ||
| + | | Startup Time | 8ms \\ 64ms \\ ※どちらでも動きます。 | | ||
| + | | BOD Voltage Level | 1.8V (5 MHz or less) | | ||
| + | | BOD Mode when Active/ | ||
| + | | Save EEPROM | EEPROM not retained | | ||
| + | | UPDI/Reset Pin Function | UPDI (no reset pin) | | ||
| + | | Voltage Baud Correction | Ignore (saves flash, almost always fine) | | ||
| - | ==== ボードマネージャのURL追加 ==== | + | {{: |
| - | ファイル | + | ---- |
| - | {{: | + | ====== 書き込み装置の選択 ====== |
| - | {{: | + | |
| - | ==== ボード情報のインストール | + | ツール |
| - | ツール | + | {{: |
| - | {{: | + | ツール |
| - | {{: | + | |
| + | {{: | ||
| ---- | ---- | ||
| - | ====== ファームウェアのスケッチをArduinoで開く | + | ====== ファームウェアの書き込み |
| - | ダウンロードしてきたスケッチをArduinoで開きます。 | + | スケッチ |
| + | |||
| + | {{: | ||
| + | |||
| + | 問題なく書き込みが完了すれば、書き込みは完了です。 | ||
| ---- | ---- | ||
| + | |||
| + | |||
mobiledecoder2/firmupdate/arduino.1625243314.txt.gz · 最終更新: 2021/07/02 16:28 by ytsurui